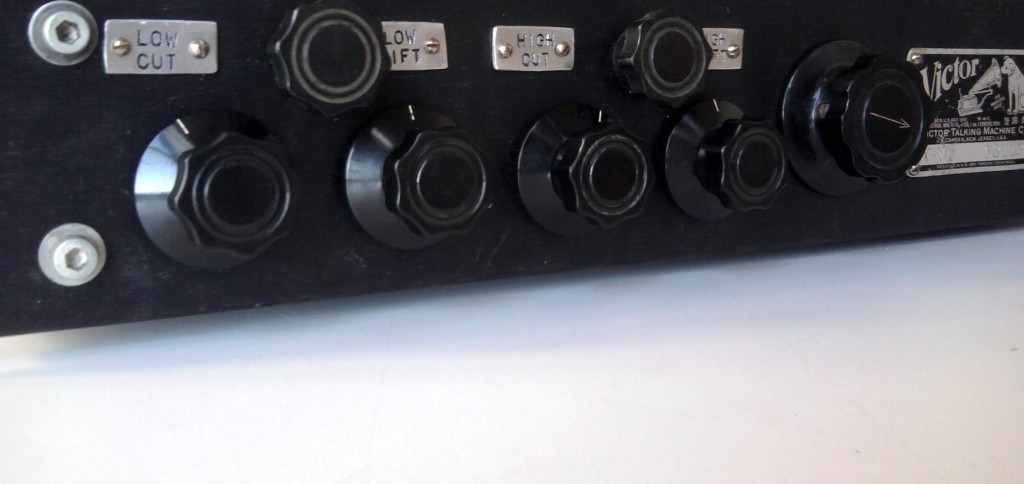
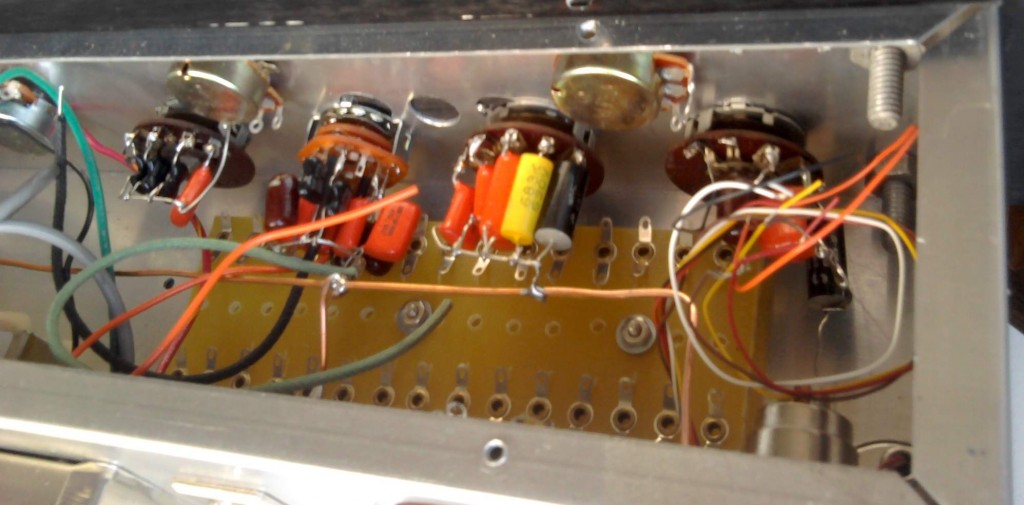
 The vacuum-tube powered program EQ that I described in this previous post is nearly complete. This thing has sat on the shelf for a while, as it was a little daunting dealing with all those parts inside a 17x4x3 chassis. So far so good, though… very excited to fire this thing up in a session.
 Here you can see the frequency-selection switches all wired up. The switches are 5-way, single-deck switches with the exception of the hi cut, which requires a 2-gang switch. The EQ has separate boost and cut sections, like a pultec, with 5 selectable frequencies for each. The amount of boost shelving is variable via a pot, while the attenuation controls are fixed cut. It would be easy to make the cut controls variable as well, but as you can see I am a little short on space! I suppose I should use a 3U enclosure the next time. Alright stay tuned…
UPDATE: This piece was finished, and it sold to a prominent producer/engineer before I had the chance to record a thorough demo of it. It worked out very well. The circuit performed as-advertised, and the only problem was that it had a little too much gain – enough to use a mic preamp in the majority of situations. Since it has sold it’s been used on several major records; when these albums are released I will provide links to some of the sounds tracked through it.
11 replies on “UPDATE: Vacuum Tube Program EQ project – Part 2”
hey Chris, congrats!
A couple questions if I may:
1) did you end up using that cathode follower circuit verbatim for this?
2) what transformers did you select for in and out?
Looking forward to checking out what this producer did with it!
Hi Steve. yes i used this exact circuit. I would advise building it as tight as possible – avoid and long wire runs inside the unit.
Input was the standard Jensen 115 1:10 tube/FET input trans. Output is a $10.22 Edcor 15K:600. I built a Mu-Metal-Foil-wrapped Aluminum case for the O/T – not sure if this was necessary. I did this because I needed to mount it on the back panel (IE., outside) the chassis.
c.
Chris,
Very inspired by this project and thought of adopting parts of it for my project.
So I tried to send you an email but it bounced back. Perhaps you can write me at my email?
Thanks,
Steve
Hi steve. What can i do for you?
I was Googling for a circuit and came upon your posting of the wonderful 1947 tube eq article. Bravo for posting and building it – it really brought me back lots of fond memory from another time, and hence I am writing to see if you would be able to help me.
My need is to put a variable boost passive eq between the output of my tube mic pre’s (with 30+ dB gain) and the input an 18K input impedance amplifier. The eq needs to be at 8KHz to solve an off-axis falloff with the HF drivers in my speakers. I tried this first by mapping the speaker response plot to the sweepable MF eq plot of my mixer and it was a pretty strong match – in reverse of course. Then I hooked it all up and it sounded right.
So I want to build a couple of small eq PCB’s to put inside the mic-pres’ 1U cases as there is plenty of room and the mic pre’s and amp should have enough gain to use a passive eq. For the circuit, I would like a boost of between 0 and 12 dB and that it be a completely reversible add-on to the existing mic pre’s. I may sell these mic pre’s at some point so I would not want them to be Frankenstein’s 😉
My email being from hotmail.com was considered SPAM and got blocked by your Google server!
Steve
Hi Steve. While I am sure you could find a tech to design and build this for you, you won’t be able to find a reliable, timely tech to do this work for less than $1000 or thereabouts.
I don’t have the technical skills or inclination to design and print PCBs, so this is not a gig for me.
IMHO, You would be much better off simply buying a good used rackmount EQ and connecting it b/w yr mic pres and whatever else you have, rather than go down what will certainly be a lengthy and frustrating path.
good luck,
c.
OK – thanks for your reply, I appreciate it.
I did not think a single-frequency passive EQ is that much work, especially when it’s between 2 known entities namely the mic pre and the amp.
Good luck with your site, I really enjoyed reading through the many vintage items you show, being a WE fan myself. One of these days, I will bring out my 22D and give it a go…
Thanks again,
Steve
steve, you did not state simply passive – you stated “variable boost passive eq,” which to me at least suggests the combination of passive EQ coupled witha gain makeup stage – the word ‘boost’ implying greater-than-unity-overall system gain.
If what you need is a stereo device with 600 ohm balanced in, some amount of insertion loss (which would be at least 12db, if you need a max of 12db ‘lift’ at 8k), and 18K single-ended out, there are a million ways to skin that cat. None are very difficult, but all will require hi-spec transformers if fidelity and pro working-levels matter to you. There are many good text books on filter design – I have one right here, ‘basic audio course’ by Donald Carl Hoefler, no ISBN #, Library of Congress card No. 55-11945. Good luck – c.
Chris,
Sorry – sounds like I misused the word “boost”. What I am hoping to build is a passive eq at 8KHz that allows me to vary the “lift” from 0 dB to +12 dB. There, I hope that is right.
I take your point about the books. I took to Googling after doing that and found your site. What I found is that while there are many many circuits out there, including quite a few variations on the Baxandall, they almost always point to the need to match source and load impedances pretty exactly if it needs to be accurate. On top of that, my mic pre output is unbalanced as there is no output transformer.
Making the circuit active reduces a lot of complexity, but introduces more artifacts and color into the signal path, altering the sound of the mic pre’s which I like. Today, I run it active by feeding the mic pre into my mixer, eq, then out to the amp. All those parts cannot add up to being neutral.
Again, thanks for your suggestions, and good luck with your site.
Steve
Hi Chris,
I suppose I´m replying to a rather old post but I´m very interested in this project.
On the introduction of the original article you mentioned:
“To use this circuit in a complete studio-ready device, we will need to add several things: First, an output stage capable of easily driving a 15k:600 output transformer. I am going to try the very simple output circuit show above”
Did you end up using this circuit in the output? And did you use any other add-on´s to make this build into a studio ready device?
I would be very happy if you could for example e-mail me all the info you had on this build, if you some miraculous way happen to have it at hand anymore.
Thank you for a very inspirational site,
Kimmo, Finland
thanks for your interest. yes i used that circuit and it worked fine. I can’t offer gratis support at this time. pls see: https://www.preservationsound.com/?page_id=359
good luck – c.