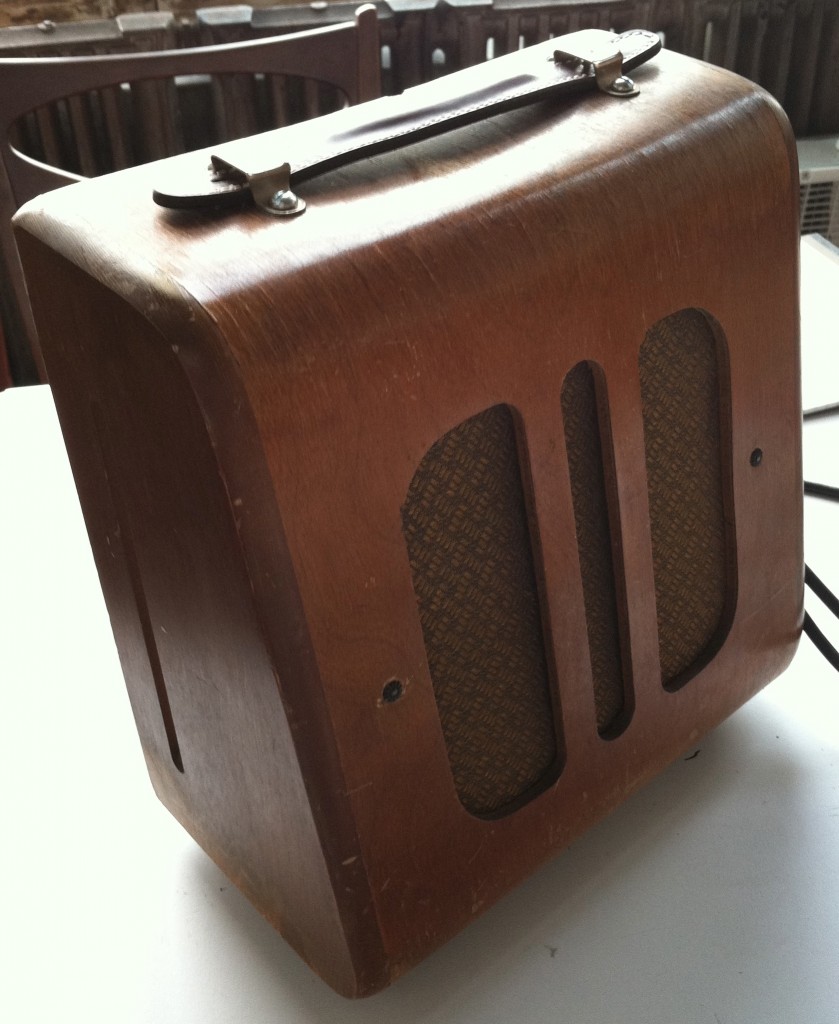
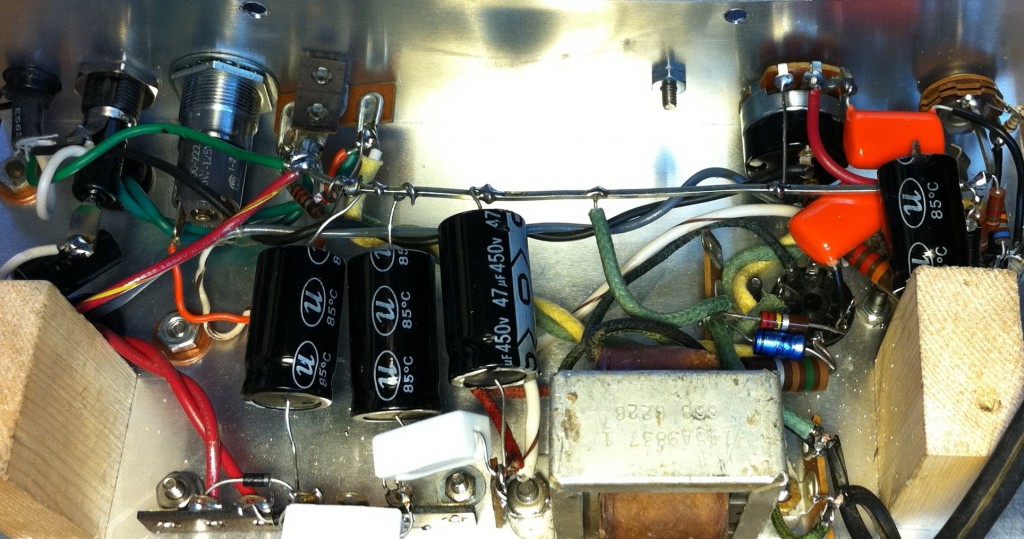
 Cassius #10; aka #10 in the the ongoing series of Fender Champ-derived guitar amps built into recycled ‘found’ vintage speaker enclosures. See here and here for some of the earlier examples. #10 is already sold, but will be avail for examination at the upcoming Open Studios event at our building this coming weekend. Cassius #10 is my first ‘Cassius’ with an EL84 output tube: it’s basically the front end of a tweed fender champ married to the power stage of a Vox AC4. Add a nice full-range 8″ Alnico HiFi driver and holy shit does this thing sound great. Solid-state rectifier, no choke, extra filtering stage in the power supply. Output transformer is from a 1950s R GE HiFi console; all other parts are new.
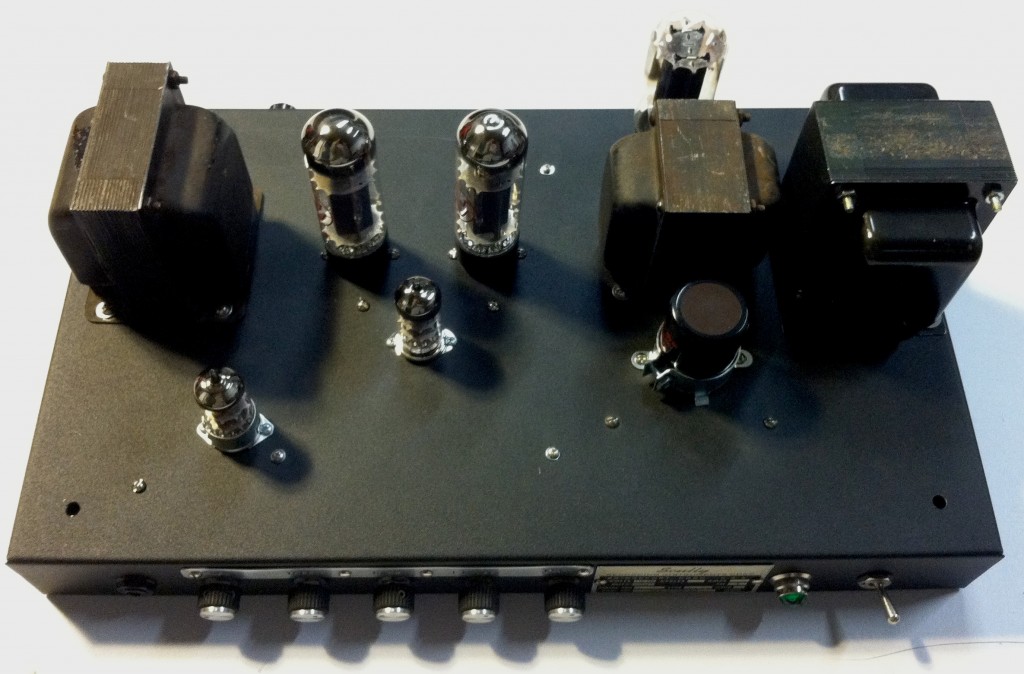 Of all the pieces that I have posted on this website this the past year, the one that gets the most page-views is still my scan of the 1970 ORANGE amplifiers catalog. I’m much more of a large-combo-amp guy then a stack-guy so i’ve never owned an actual vintage Orange amp head. That couldn’t stop me from building one though.
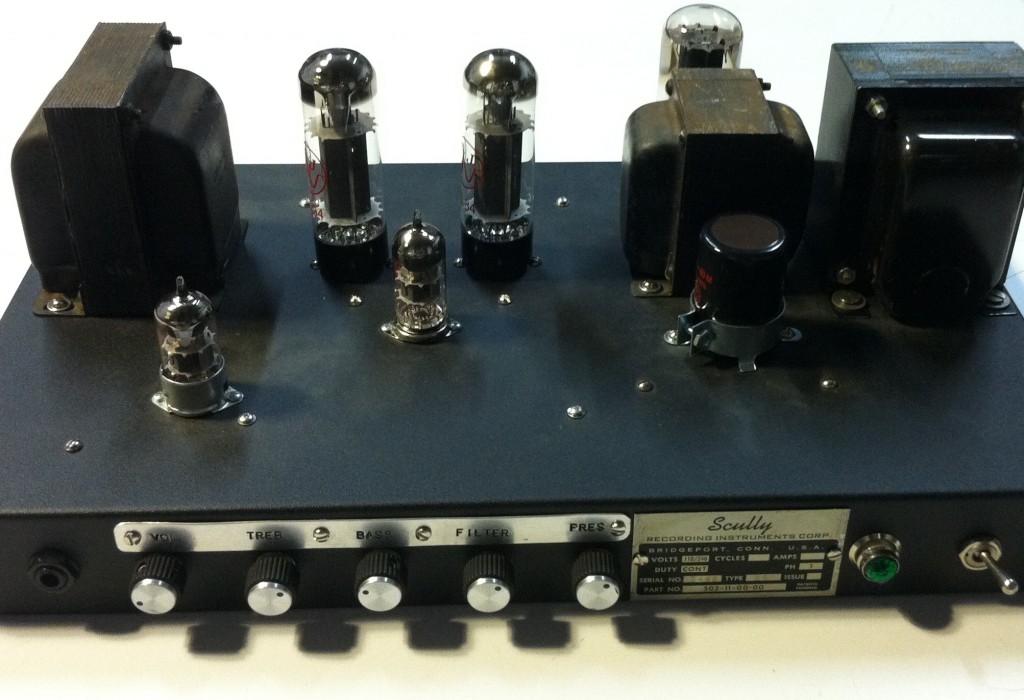 Above, my version of an Orange Graphic 80. Two EL34 output tubes, two 12AX7 preamp tubes, effects loop, variable low-cut filter, adjustable ‘fixed’ bias. Unlike an actual Orange Graphic 80, I used a high-voltage mains transformer and a 5U4 tube rectifier (Orange originally used a voltage doubler and a diode bridge). I also used a slightly different supply for the grid bias voltage as my Hammond power transformer did not have a bias winding. For the output and choke transformers I used pulls from a beat 1950s RCA PA head; it was rated at 30 watts (7027 tubes) so we’ll see how long this output transformer lasts….
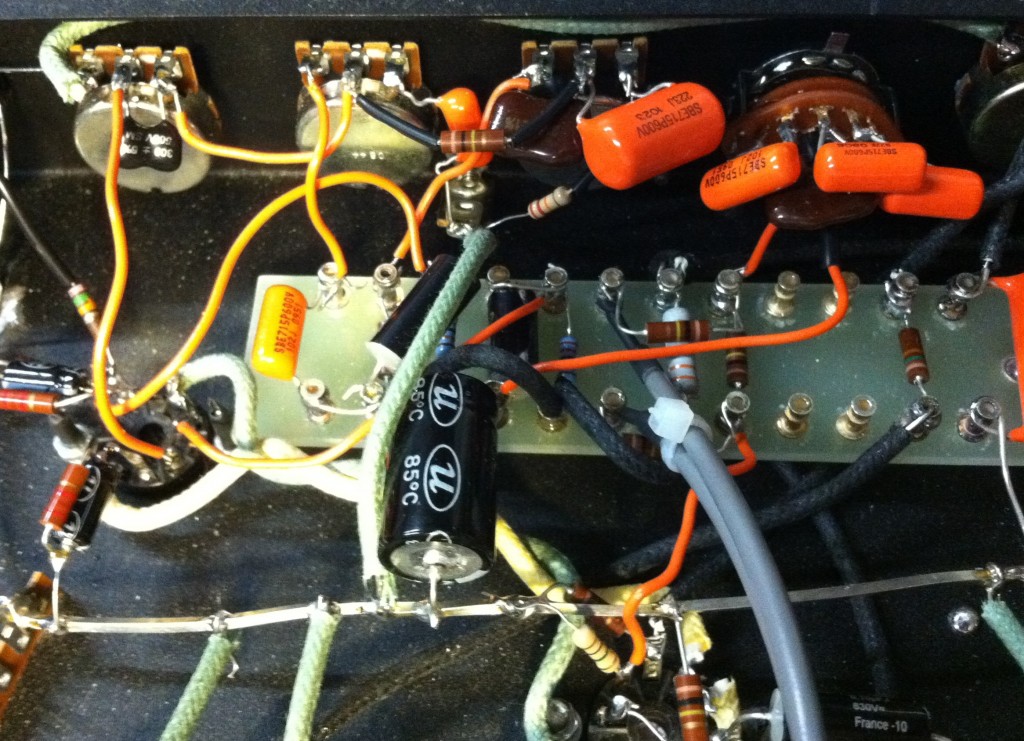
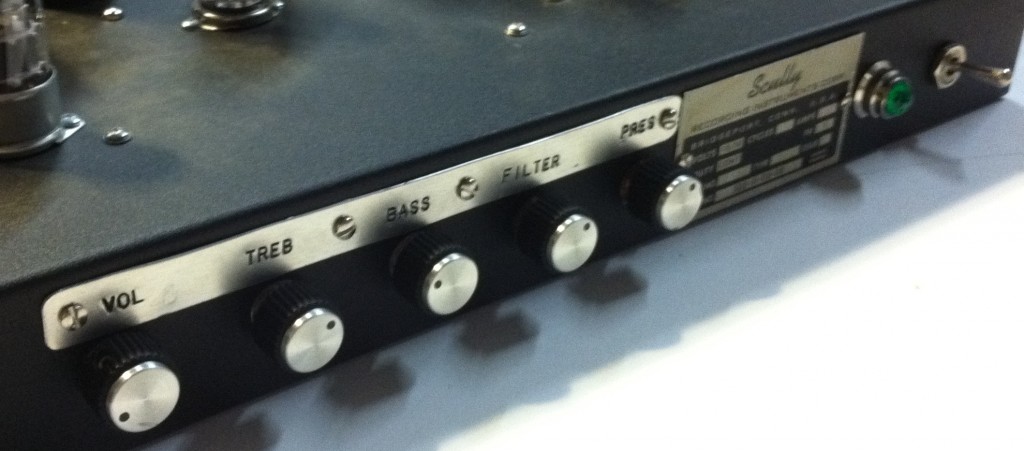 The most unique feature of the Orange amps is the bit labeled ‘filter’ here; Orange called it the ‘F.A.C’ control; it’s simply a 6-position high-pass filter that follows the coupling cap before the phase inverter. It’s composed of a 6-position rotary switch with 5 carefully-chosen caps strung in series between the taps. Simple as it is, it does make for a much more versatile amplifier. I recently built this circuit into one of my Cassius amps (already sold) it worked great there too.
Want to know more about building your own Orange Graphic from scratch? Follow the link below to READ ON…
So how does it sound? After some pretty minimal troubleshooting, great! WOW even with only two EL34s, this thing is insanely loud. My lord. My only (small) complaint: the bass and treble controls have slightly awkward swings to them… even though I used audio-taper pots, 50% of the action seems to occur in the last 10% of the control-movement. As far as the gain: I might actually rewire one of the input stages with a 100k plate load resistor and corresponding 1500 ohm cathode resistor just to lessen the gain a little bit.
Some tips if you plan to build an Orange Graphic: the bass and treble pots should be wired similar to the volume pot; I.E., if the right leg of the volume pot goes to ground, it would be the right leg of the bass and treble pots that go to ground (via a resistor and a capacitor, respectively). I wired them up opposite to the volume pot and now I have very counter-intuitive bass and treble controls, which I certainly can’t be bothered to change. Here’s a link to (basically…) the schematic that I used. This is the non-master-volume model. If you are into the whole master-volume thing, there are plenty of schems online which indicate that iteration as well (for instance, here). One important note: I was having crazy RF problems with the volume pot set to zero. After a little troubleshooting, the fix was adding a ‘grid stopper’ resistor between the wiper of the volume pot and the following tube grid (i used a 9.1k ohm, for no particular reason). This solved the problem with no averse effects. Another note: The Orange schem indicated that the bias voltage should be set to -37v. In practice, with 477 volts on the plates of the EL34s, this was causing the output tubes (new JJ EL34s) to draw a lil too much current. -39v seemed to be the right choice (results in 25 watts/tube plate dissipation).
Like the schematic said, the 80 watt model is exactly the same as the 120 watt model except that it omits two output tubes (and requires a different primary impedance on the output transformer, but if you’ve read this far, you prolly already know that). I rarely build big, fixed bias guitar amps: the several big Fenders, Sunns, and Ampegs I have seem to do the trick for my own studio work, and the parts cost (read: transformer cost) is so high that frankly it’s hard to justify the expense to customers, who mainly want small amps that break up early anyhow. That being said, this Orange came together very easily; trust the schematic, and remember: +/- 20% on component values will yield good results 95% of the time in guitar amps. Just like Leo Fender said. Anyway, If you need a loud guitar amp for some reason, give it a shot. It’s a robust, versatile circuit, and it seems to run a lot quieter than most factory-built Marshalls I have played.
Update 2: I had the chance y’day to try out the effects loop on the Orange 80 clone.
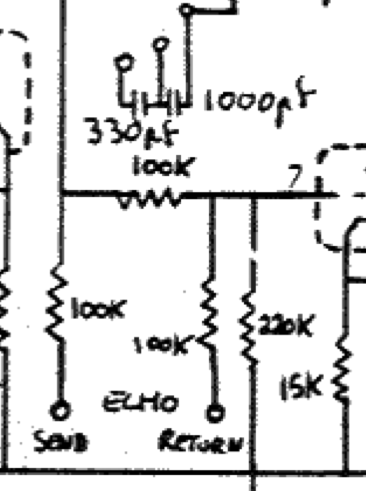 If you take a look at the full schematic, you will see that this extremely basic circuit is inserted between the 12Ax7 gain-makeup stage that follows the tone/volume controls and the subsequent voltage amplification stage. Basically, after the coupling cap (or, in the case of this particular amp, the string of variously selectable coupling caps), we go to a 1/4″ jack via a 100k resistor. This is our effects send. From that same point, we also go to the next tube-stage input grid via another 100k resistor, AND we go to a second 1/4″ jack via a third 100k resistor. This jack is our effects return. There is no wet/dry balance control, no effects drive control, no buffering… and you know what, it works just fine, even with the very high plate impedance of the 12Ax7 tube that drives the effects send. I wired the 100k isolation resistors very close to the rest of the preamp and used shielded cable to make the run to and from the jacks. Ordinarily i never use shielded cable inside an audio device (you’re just begging for hi-frequency loss) but given that this was an effects loop and there was likely a substantial impedance mismatch anyway, I figured the reduced noise trumped any slight sonic deficit. Now, clearly, there are some effects units that probably won’t work well in this loop, E.G., vintage pro rack devices that have true 600ohm input impedance. I used ‘whatever i had around,’ which happened to be a TC Electronics M300. I bought it as a 2nd effects unit for our PA system and never actually installed it. Cost about $100 used.
The M300 has a 13K ohm unbalanced input impedance. Based on my success with this unit, I would guess that any effect device with 10K or high input impedance will probably work fine. When I originally bought this unit at Daddys Junky Music (RIP – also – you fkkrs owe me money…), I chose it because it has totally separate reverb and effects sections, a tap tempo button, and… no menus! There is actually a dedicated knob for each function. I have never, ever used a multi-effect unit in a guitar ‘rig’ before (I don’t think I’ve ever had an amp with an FX loop?) but I gotta admit it’s pretty fun.
Anyways… what’s the point… the point is: this simply three-resistor, two-jack ‘effects loop’ could easily be added to any guitar amp that has a voltage amp (e.g., 12A_7 tube) stage following the tone-control-gain-makeup stage. Go wild.

4 replies on “A couple of recent guitar amplifier builds *Revised (2)*”
Hey Chris,
I noticed there isn’t a stand-by switch on the OR80 Build.
How critical are stand-by switches? Do chokes negate the need for one? Or are they not related in that sense.
How do you calculate how many mA a choke should be rated for? if you know the B+ voltage.
-al
Hi al. The choke situation does not impact the need for a standby switch. rather, it is the presence of the rectifier tube that negates the absolute need for the standby, because it prevents the full B+ voltage from hitting the audio-tube plates before the tubes are heated up. As a general rule, if you use a solid-state rectifier, it’s a good idea to have (and use!) a standby switch.
The choke should be rated near (or higher than) the current draw of the audio-portion of the amp. If you don’t know how to figure this… you might wanna read up a little more. I can give u some general ballparks tho: a two-6V6 (or EL84) amp is about 100ma, two 6L6 (or EL34) is about 200ma, four 6L6 amp is about 400ma.
Good luck
c.
You mean four 6L6s I suppose…or a pair of KT88s.
YES i meant 6L6, sorry…. and an amp with a pair of KT88 or 6550 will be in the 300ma range, maybe 350 including the preamp.